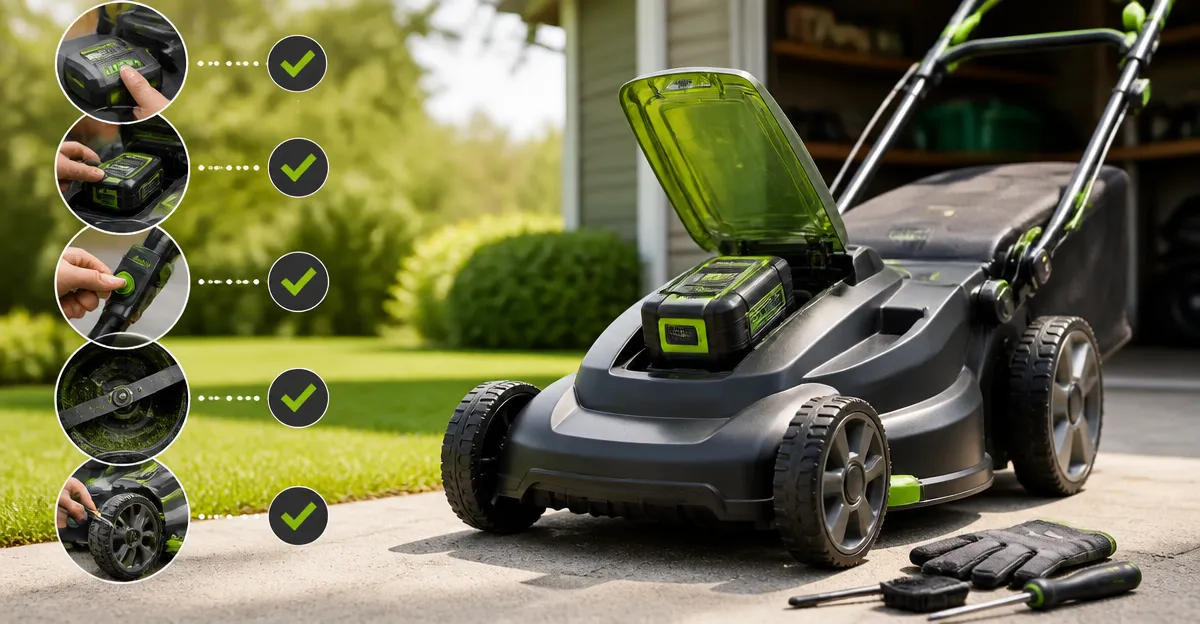
How to Troubleshoot a Cordless Mower That Won't Start: Complete Step‑by‑Step Checklist & Quick Fixes
Introduction
Homeowners and garden enthusiasts frequently rely on cordless mowers for quiet, emission‑free lawn care. When a mower fails to start, the inconvenience can disrupt weekly maintenance routines and increase reliance on professional services. This guide will teach the reader how to diagnose the most common causes of a non‑starting cordless mower, apply quick fixes, and prevent future failures. By following the systematic checklist, one can restore reliable operation without unnecessary expense.
What You’ll Need
- Multimeter (to test voltage)
- Phillips screwdriver set
- Soft brush or compressed air for cleaning contacts
- Spare lithium‑ion battery compatible with the mower
- Protective gloves and safety glasses
For many of these items, a high‑quality cordless mower that includes a spare battery and charger can serve as an excellent reference tool. The Greenworks 40V 16in Push Lawn Mower ships with a 4.0 Ah battery and charger that are ideal for testing voltage and charging procedures.
Step 1: Verify Battery Charge
The first and most common reason a cordless mower will not start is insufficient battery charge. Remove the battery pack from the mower and inspect the indicator lights on the charger. If the lights do not illuminate, the charger may be faulty or the battery connection may be loose.
Use the charger that accompanies the Greenworks 40V 16in Push Lawn Mower. This charger provides a rapid 4.0 Ah charge in approximately 3 hours, and the battery indicator displays three green LEDs when fully charged. The mower’s battery is rated for up to 1/3 acre per charge, making it suitable for medium‑size lawns.
If the battery does not charge, test the output voltage with a multimeter. A healthy 40 V battery should read between 38 V and 42 V under no‑load conditions. Values below this range indicate a degraded cell that may need replacement.
When a replacement is required, consider the dual‑battery system of the Casince 17" Cordless Lawn Mower. Its two 20 V 4.0 Ah batteries provide up to 40 minutes of runtime each, and the interchangeable design allows one battery to charge while the other powers the mower, minimizing downtime.
Step 2: Inspect Safety Switches and Interlock
Most cordless mowers incorporate a safety interlock that prevents the motor from engaging unless the handle is firmly pressed. Locate the safety switch on the handle and verify that it moves freely without obstruction. Accumulated debris or worn contacts can cause the switch to fail.
The EWORK 40V 14" Cordless Mower features a double‑safety trigger that provides both a push‑button start and a lever‑activated interlock. Its design demonstrates how a reliable safety system should feel smooth and responsive. Users can compare the feel of their mower’s switch to the EWORK model to assess whether excessive play is present.
If the switch feels sticky, clean it with a soft brush and apply a small amount of electrical contact cleaner. Re‑assemble the handle and test the start sequence again. Persistent failure may require replacement of the safety module, which is often sold as a separate part by the manufacturer.
When purchasing a replacement safety switch, select a component that matches the voltage rating of the mower (e.g., 40 V for Greenworks and EWORK models). Using an underspecified part can lead to premature wear or electrical hazards.
Step 3: Examine Blade, Deck, and Debris Build‑Up
Obstructed blades or a clogged deck can prevent the motor from turning over. Disconnect the battery before removing the blade guard to avoid accidental start‑up. Use a screwdriver to detach the guard, then inspect the blade for grass clumps, stones, or rust.
The LawnMaster 48V 19" Cordless Mower utilizes a 19‑inch steel deck that resists deformation and facilitates easy cleaning. Its side‑discharge and mulching options illustrate the importance of a well‑designed deck for debris management. While the LawnMaster’s deck is larger than the 16‑inch Greenworks deck, the cleaning principles remain identical.
Remove any tangled grass with a soft brush or compressed air. Avoid using metal tools that could damage the blade’s edge. After cleaning, re‑attach the guard, ensure all fasteners are tightened, and reconnect the battery.
Regular maintenance, such as cleaning after each use, extends blade life and reduces the likelihood of start‑up failure caused by mechanical resistance.
Step 4: Check Motor Connections and Wiring
Loose or corroded wiring can interrupt power flow to the motor. With the battery removed, examine the motor’s connector plug for signs of oxidation or bent pins. Gently reseat the plug and verify that the locking tab engages securely.
The Casince 17" Cordless Lawn Mower employs a brushless motor that relies on a robust connector system to deliver up to 1200 W of power. Its connector design serves as a benchmark for secure electrical contact. If the mower under inspection uses a similar plug, compare the two for fit and finish.
When corrosion is present, clean the contacts with isopropyl alcohol and a lint‑free cloth. Allow the connectors to dry completely before re‑assembly. If the wiring harness shows frayed insulation, replace the affected segment with a matching gauge wire.
After confirming all connections, reinstall the battery and attempt to start the mower. A successful start indicates that the electrical pathway is intact.
Step 5: Evaluate Battery Health and Capacity
Even a fully charged battery may suffer from reduced capacity due to age or repeated deep‑discharge cycles. Conduct a load test by operating the mower at half throttle for two minutes while monitoring voltage drop. A healthy battery should maintain at least 90 % of its nominal voltage.
The MZK 20V 13" Cordless Mower includes two 20 V 4.0 Ah batteries and a rapid charger, making it an excellent reference for evaluating runtime expectations. Its 30 L bag and brushless motor illustrate how a compact mower can still deliver consistent performance when the batteries are in good condition.
If the load test reveals a rapid voltage decline, consider purchasing a replacement battery pack. The Greenworks ecosystem offers cross‑compatibility; the 40 V battery used in the Greenworks mower also powers a range of trimmers, blowers, and chainsaws, providing added value.
When selecting a new battery, prioritize models with a minimum of three‑year warranty, as offered by Greenworks. A longer warranty reduces long‑term risk and ensures that the mower remains operational for several seasons.
Step 6: Reset the Controller and Perform a Test Run
Modern cordless mowers incorporate electronic controllers that may retain error codes after a fault. Locate the reset button—often a recessed pinhole near the battery compartment—and press it for five seconds using a paperclip. This action clears stored errors and restores default parameters.
After resetting, re‑insert the battery, engage the safety switch, and press the start button. Observe whether the motor spins smoothly and the blade begins to rotate. If the mower starts, perform a short mowing session to confirm stable operation.
If the mower still fails to start, repeat the earlier steps to ensure no detail was missed. At this stage, contacting the manufacturer’s support line is advisable, especially when the unit is still under warranty.
Document the troubleshooting process, including voltage readings and observed symptoms. This record can accelerate warranty service and provide useful information for future maintenance.
Tips & Pro Tips
- Always disconnect the battery before performing any mechanical inspection to prevent accidental activation.
- Store batteries in a cool, dry environment; extreme temperatures accelerate capacity loss.
- Rotate batteries regularly if the mower uses multiple packs; this ensures even wear and extends overall life.
- Clean the mower deck after each use to prevent grass buildup, which can cause motor strain.
- Schedule a quarterly inspection of safety switches and wiring to catch early signs of wear.
Troubleshooting Quick Reference
| Symptom | Possible Cause | Suggested Action |
|---|---|---|
| No power at all | Battery not charged or dead | Charge battery, perform load test, replace if voltage low |
| Motor hums but blade does not spin | Safety interlock not engaged | Inspect and clean safety switch, ensure handle is fully pressed |
| Intermittent start | Loose wiring or corroded connector | Reseat connectors, clean contacts, replace damaged wires |
| Rapid battery drain | Worn battery cells | Conduct load test, replace battery pack |
| Excessive vibration | Blade obstruction or dull blade | Clean deck, sharpen or replace blade |
Conclusion
By following this comprehensive checklist, one can identify and resolve the majority of issues that prevent a cordless mower from starting. The process emphasizes safety, systematic testing, and proper maintenance, thereby extending the lifespan of the equipment. When a reliable battery, clean deck, and functional safety interlock are ensured, the mower will deliver the quiet, efficient performance that modern homeowners expect.
Readers are encouraged to apply these steps before seeking professional repair, as many problems are easily corrected with basic tools. Investing in a quality mower such as the Greenworks 40V 16in Push Lawn Mower or the Casince 17" Cordless Lawn Mower provides a solid foundation for trouble‑free lawn care.
Products Mentioned in This Guide
Frequently Asked Questions
Why won't my cordless mower start even though the battery is fully charged?
A fully charged battery can still be faulty or have poor connections; test the voltage with a multimeter and inspect the battery terminals for corrosion.
How can I tell if the mower's safety switch is preventing it from starting?
If the safety switch is engaged or damaged, the mower won’t run; press the switch firmly and check for continuity with a multimeter.
What should I do if the mower's motor makes a clicking sound but doesn't run?
A clicking sound often indicates insufficient power; verify battery voltage, ensure the battery is properly seated, and check the motor brushes for wear.
Can dirty or corroded contacts stop the mower from starting, and how do I clean them?
Yes, dirty contacts impede current flow; use a soft brush or compressed air to remove debris, then wipe contacts with a dry cloth.
When should I replace the battery instead of trying to repair the mower?
Replace the battery if voltage drops below the mower’s rated level under load or if the battery no longer holds a charge after several cycles.